mNo edit summary |
Jamesa7171 (talk | contribs) mNo edit summary |
||
| Line 10: | Line 10: | ||
|time = 600 |
|time = 600 |
||
|bold = 441 (the [[Melinda time]] is 443) |
|bold = 441 (the [[Melinda time]] is 443) |
||
| − | |difficulty = |
+ | |difficulty = 3 |
| + | |bold difficulty = 5 |
||
}} |
}} |
||
Revision as of 17:20, 24 June 2010
| |
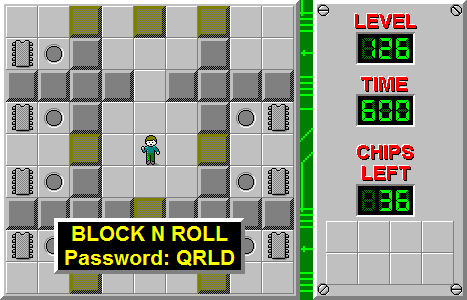
| Level set | Chip's Challenge 1 |
|---|---|
| Level number | 126 |
| Password | QRLD |
| Hint | None |
| Chips required | 36 |
| Chips available | 36 |
| Time limit | 600 |
| Bold time (MS) | Unknown edit |
| Bold time (Lynx) | Unknown edit |
| Bold time (CC2) | Unknown edit |
| Difficulty | ***** |
| Bold difficulty | ***** |
| Bold complexity | Unknown edit |
You can find the page you were looking for at:
https://wiki.bitbusters.club/Block_N_Roll.
This wiki is no longer maintained.
Block N Roll is the 126th level in Chip's Challenge 1. The current AVI scores 439, the present Public TWS scores 440, and the highest time scored on this level is 441.8. As the real part of an April Fools' Day 2010 hoax, a gain of [6] was revealed in the northwest room, increasing the Melinda time from 442 to 443. Although this new route has been discovered, it has not yet been used in a full AVI recording, although it is in the current public TWS. The second video shows only the new route in a special test level made specifically for the purpose of testing such routes.
To add to this challenge, Block N Roll is full of walkers, which causes it to be one of the hardest bolds in the set to even get close to. In addition, you spend 68 seconds pushing around blocks before you even reach the walkers! Fortunately, Block N Roll isn't as hard to simply complete as it is to optimize, although the northwest block puzzle is still very difficult.
Move the first two blocks directly to the water, then move the five blocks in the vaults on the sides 2L or 2R to reach the chips and the block itself for use. In addition, one other free block is located at the bottom. Six blocks reaches one chip, and two more gets to a second chip. Now, go through the walker rooms to the first room on the south end, shove the fifth block into the water, the fourth block anywhere from 2U to 6U depending on the current state of the walkers, and then use the second block, followed by the other two in either order, depending on where the walkers are currently moving.
In addition to the variable movement of the fourth block and the variable order of the final two blocks, an additional strategy is to move the fourth block L as you are collecting the third block; this takes [2] longer to reach the third block, but returns this by cutting the time to use the fourth block by [2], and can be used if going directly to the third block would or could lead to being stopped. Players of Blobnet will be familiar with these types of strategies, although logic usually plays a greater role when dealing with walkers.
From here, play all the way to the top and step onto the gravel, where some bugs are bouncing around. If you have lost no more than [3], Chip can pass this part without having to wait for a bounce back. The difference between the 439 and 440 routes is that in the solution given, Chip didn't make it through only [3]. If you can do so, you are on the track to 440.
Wipe the chips out from the beehive, then play to the northwest block room and play through it as shown to collect a few chips. Return to the center of the rooms and play right and up to reach two side paths to a pair of chips behind three blocks, and then move past the socket on the right to the very bottom, with a bunch of blocks and bugs circling the edge. Every odd block from the northwest in forwards reading order is hot, which could annoy you if you didn't know this! Play off the gravel in a zigzag: 4:DR 2:[2:DL 2:UL] 2:UR, and then play to the exit on the far east side.
Walkthrough
- This is a 439 route. More information on different routes can be found in the guide.
You can find the page you were looking for at:
https://wiki.bitbusters.club/Block_N_Roll.
This wiki is no longer maintained.